Share ko lang ang kunting kaalaman kung paano niyo epublish yung application na ginawa niyo sa Visual Studio.
Step 1: Open Visual Studio. Open ur project/application then go to properties. (
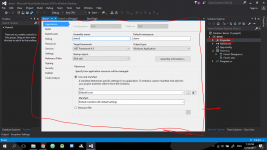
Step 2: Don't forget to change it into "Release" instead of Debug.
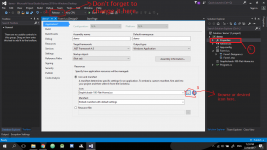
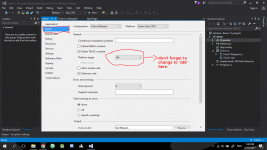
Step 3: Go to Build. Find Platform target and change it to x86.
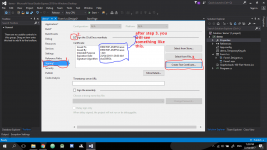
Step 4: Go to Signing. Check the "Sign the ClickOne Manifests". Then click "Create Test Certificate"
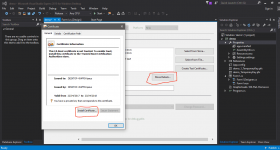
Step 5: Click More Details. Install Certificate then click Okay.
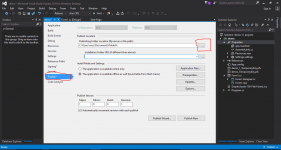
Step 6: Go to Publish. Then browse kayu kung saan location niyo gustong makita yung set.up/published app niyo po.
Step 7: Download IIS Manager and IIS 10.0 (Kailangan po to incase na kailangan e update yung application na ginawa niyo. This will act as a web server to allow the clients to automatically update ur app incase may mga update kayong ginawa sa app niyo. )
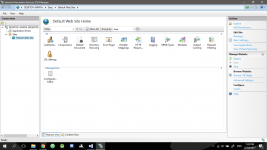
Open IIS Manager >> Go to >>Sites >>Default Web Sites.
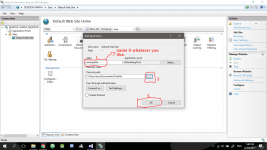
Step 8: Right Click. Pangalanan yung "Allias" (Name it whatever you want)
Yung "Physical Path" same path destination ng Step 5. then click Okay.
Step 9: Balik kayo sa Visual Studio then follow this step. Notice na pagkatapos po ng localhost/ ay autoupdate po yung panganlan na sumonod kasi yun po yung Allias na pinangalan ko (see Step 7). After is, Click Updates.
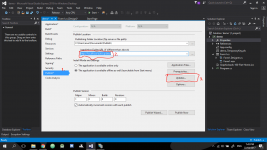
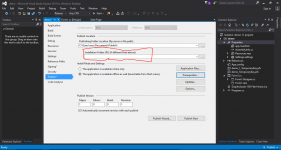
Step 10: Make sure naka Check po yung nagpaka red circle then same path po sila ng Step 8. Then Click Ok.
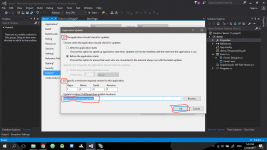
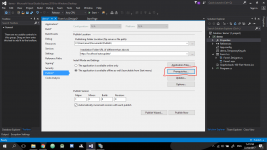
Step 11. Click Prerequisites.
Step 12. Make sure nakacheck ito.
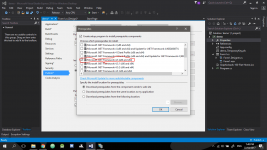
Step 13: Browse kayo pababa then you will see Windows Installer. Then check it and click okay.
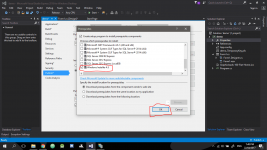
Step 14. Go to Options
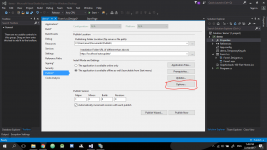
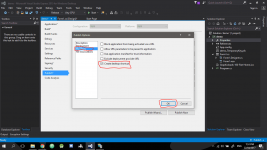
Step 15: Go to Manifest. Check the "Create Desktop Shortcut" then click Okay.
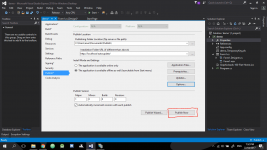
Step 17. Click Publish Now.
Step 18: Hintay lang kayo matapus ang process katulad nito.
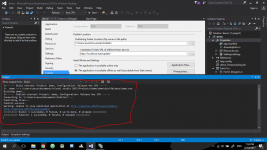
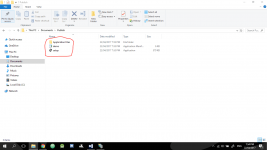
Step 19. Tada. Ito na yung Application niyo.
Step 1: Open Visual Studio. Open ur project/application then go to properties. (
You will see something like this

Step 2: Don't forget to change it into "Release" instead of Debug.

Step 3: Go to Build. Find Platform target and change it to x86.

Step 4: Go to Signing. Check the "Sign the ClickOne Manifests". Then click "Create Test Certificate"

Step 5: Click More Details. Install Certificate then click Okay.

Step 6: Go to Publish. Then browse kayu kung saan location niyo gustong makita yung set.up/published app niyo po.

Step 7: Download IIS Manager and IIS 10.0 (Kailangan po to incase na kailangan e update yung application na ginawa niyo. This will act as a web server to allow the clients to automatically update ur app incase may mga update kayong ginawa sa app niyo. )
Open IIS Manager >> Go to >>Sites >>Default Web Sites.

Step 8: Right Click. Pangalanan yung "Allias" (Name it whatever you want)
Yung "Physical Path" same path destination ng Step 5. then click Okay.

Step 9: Balik kayo sa Visual Studio then follow this step. Notice na pagkatapos po ng localhost/ ay autoupdate po yung panganlan na sumonod kasi yun po yung Allias na pinangalan ko (see Step 7). After is, Click Updates.

Step 10: Make sure naka Check po yung nagpaka red circle then same path po sila ng Step 8. Then Click Ok.

Step 11. Click Prerequisites.

Step 12. Make sure nakacheck ito.

Step 13: Browse kayo pababa then you will see Windows Installer. Then check it and click okay.

Step 14. Go to Options

Step 15: Go to Manifest. Check the "Create Desktop Shortcut" then click Okay.

Step 17. Click Publish Now.

Step 18: Hintay lang kayo matapus ang process katulad nito.

Step 19. Tada. Ito na yung Application niyo.

Alternative.
Kung wala kayong IIS Manager and IIS 10.0. pwd niyo parin pong epublish yung app niyo.
Just REMAIN EMPTY HERE and SKIP STEP 7, 8, 9, 10.
Proceed kayo kaagad sa Step 11 after nang Step 6.
Kung wala kayong IIS Manager and IIS 10.0. pwd niyo parin pong epublish yung app niyo.
Just REMAIN EMPTY HERE and SKIP STEP 7, 8, 9, 10.
Proceed kayo kaagad sa Step 11 after nang Step 6.

That's all. Sana nakatulong. 
Attachments
-
You do not have permission to view the full content of this post. Log in or register now.