parataban95
Honorary Poster
- Joined
- Sep 24, 2016
- Posts
- 158
- Reaction
- 46
- Points
- 132
You will find out how to install Raspberry Pi Desktop on a PC or Apple Mac to get the Raspberry Pi experience on your laptop or desktop computer.
Running Raspberry Pi Desktop is a great way to make use of an old computer that’s not capable of running the latest version of Windows or macOS.
Additionally, Raspberry Pi Desktop includes lots of software tools to get you started with coding and digital making
Warning: installing Raspberry Pi Desktop on a computer will delete all the data on it. Be sure to back up anything you need before you go any further.
Warning: setting up a USB drive as an installer will delete all the files on the drive. If you need any files on the drive you’re planning to use, make sure you have backed them up.
Warning: selecting the wrong drive and then proceeding to the next step will result in all the data on the drive being deleted.
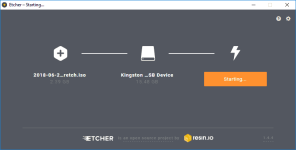
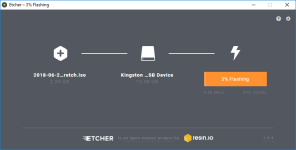
Etcher will show the message Starting, and then it will show the Flashing progress.
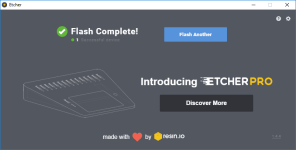
When the process is complete, you will see the message Flash Complete.
Warning: remember, installing the Raspberry Pi Desktop will delete all the data on your computer. Be sure that you have backed up everything you need before continuing.
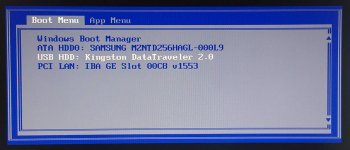
To be able to do this, you may need to press a key while the computer is starting up to open the boot menu and select USB. The key you need to press depends on the make and model of your computer.
You can find out the boot menu key of many makes and models of computers at You do not have permission to view the full content of this post. Log in or register now..
The installation process will now install media and detect what hardware is present.
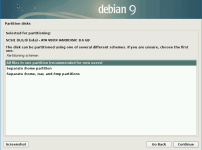
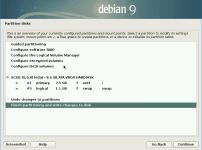
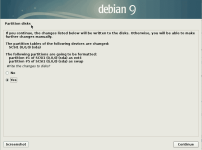
The Debian operating system installation will now run.
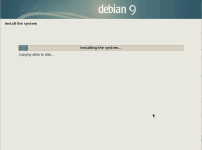
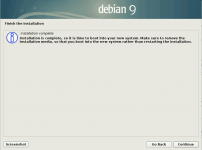
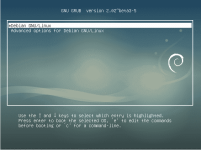
Your computer will automatically reboot and then show you the GNU GRUB boot screen.
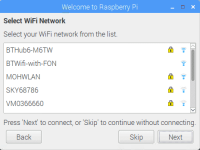
Note: if your computer doesn’t have wireless connectivity, you won’t see this screen.
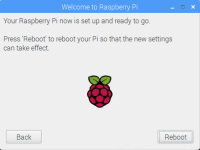
Your Raspberry Pi Desktop is now ready to use!
Running Raspberry Pi Desktop is a great way to make use of an old computer that’s not capable of running the latest version of Windows or macOS.
Additionally, Raspberry Pi Desktop includes lots of software tools to get you started with coding and digital making
Warning: installing Raspberry Pi Desktop on a computer will delete all the data on it. Be sure to back up anything you need before you go any further.
Download Raspberry Pi Desktop
- Go to the You do not have permission to view the full content of this post. Log in or register now., and start the download of the latest installation file by clicking the Download ISO button.
- Save the .iso installation file on your computer. Make sure to memorise where you’re saving the file, as you will need it in the next step.
Create a USB drive installer
The installer is the USB drive that will hold all the installation files required to set up your computer with Raspberry Pi Desktop. You’ll be able to use your installer multiple times to install the Raspberry Pi Desktop on multiple computers.Warning: setting up a USB drive as an installer will delete all the files on the drive. If you need any files on the drive you’re planning to use, make sure you have backed them up.
- Insert the USB drive into your computer.
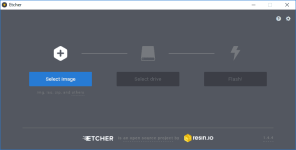
- Open the Etcher program to write the Raspberry Pi Desktop installation to the USB drive.

Need to download and install Etcher?
- In Etcher, click Select Image.
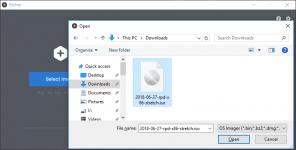
- In the window that opens, select the Raspberry Pi Desktop ISO file you downloaded, and then click Open.

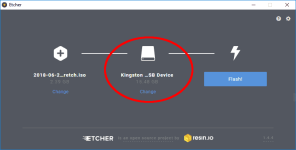
- Select the correct USB drive. If you need to change the one that is selected, click Change.

Warning: selecting the wrong drive and then proceeding to the next step will result in all the data on the drive being deleted.
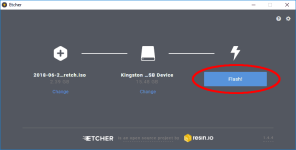
- Click Flash to write the Raspberry Pi Desktop image to your USB drive.

Etcher will show the message Starting, and then it will show the Flashing progress.


When the process is complete, you will see the message Flash Complete.

Boot from the USB drive
To install the Raspberry Pi Desktop from your USB drive installer, you will need to boot your computer from the USB drive.Warning: remember, installing the Raspberry Pi Desktop will delete all the data on your computer. Be sure that you have backed up everything you need before continuing.
To be able to do this, you may need to press a key while the computer is starting up to open the boot menu and select USB. The key you need to press depends on the make and model of your computer.
You can find out the boot menu key of many makes and models of computers at You do not have permission to view the full content of this post. Log in or register now..
- Insert the USB drive installer into the computer.
- Turn on the computer.
- As the computer is starting up, press the boot menu key. You may need to press it multiple times in order for the menu to appear.

- Select the option for your USB drive, probably called USB-HDD, and press Enter.
Install Raspberry Pi Desktop
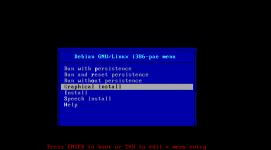
After booting from your USB drive installer, the Debian installation menu will appear.- Select Graphical install from the Debian GNU/Linux menu.

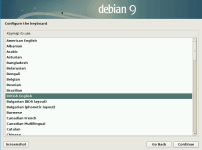
- Select your keyboard type and click Continue.

The installation process will now install media and detect what hardware is present.
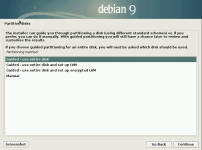
- To set how you want to partition your hard disk, select Guided - use entire disk, and click Continue.

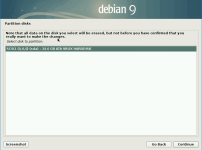
- Select the disk to be partitioned, there maybe more than 1 and click Continue.
Which drive to select?

- To set the partitioning scheme, select All files in one partition (recommended for new users), and click Continue.

- To confirm the partition settings, select Finish partitioning and write changes to disk, and click Continue.

- Confirm that you wish to write the changes to the disk by selecting Yes and clicking Continue.

The Debian operating system installation will now run.

Need to install the GRUB boot loader?
- When the installation is finished, click Continue.

Your computer will automatically reboot and then show you the GNU GRUB boot screen.

- Press Enter to run Debian GNU/Linux.
- Now that the installation in complete, you can remove the USB drive installer from the computer.
Start up Raspberry Pi Desktop
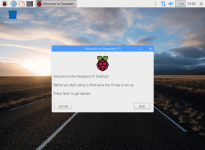
When you start your Raspberry Pi Desktop for the first time, the Welcome to Raspberry Pi application will pop up and guide you through the initial setup.
- Click Next to start the setup.
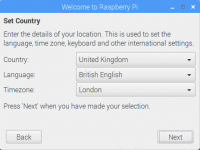
- Set your Country, Language, and Timezone, then click Next again.

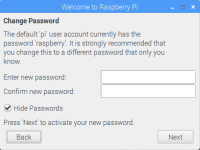
- Enter a new password for your Raspberry Pi and click Next.

- Connect to your WiFi network by selecting its name, entering the password, and clicking Next.

Note: if your computer doesn’t have wireless connectivity, you won’t see this screen.
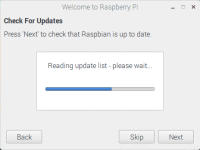
- Click Next to let the application check for updates to Raspberry Pi Desktop and install them (this might take a little while).

- Click Done or Reboot to finish the setup.

Your Raspberry Pi Desktop is now ready to use!
Attachments
-
You do not have permission to view the full content of this post. Log in or register now.