What's new

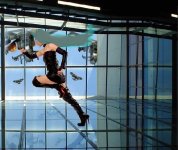
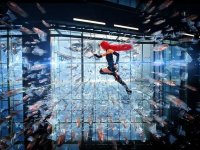
Closed Create an Intense “Blade Runner” Inspired Composition With Shattered Glass and Bullets

Status
Not open for further replies.

Master Chief

Honorary Poster
Established
Joined
Mar 19, 2011
Posts
108
Reaction
336
Points
142
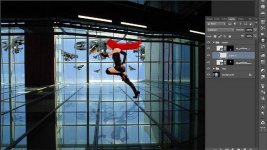
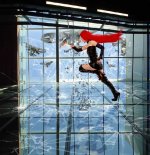
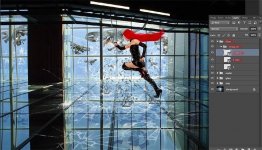
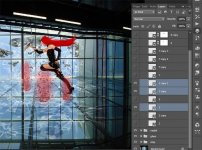
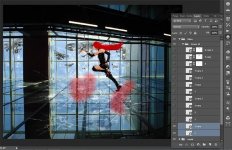
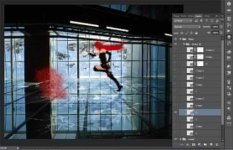
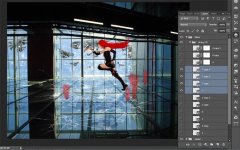
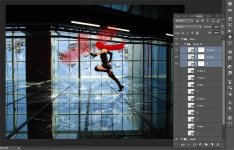
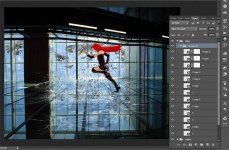
Learn how to this surreal photo manipulation of Blade Runner on an interior skyscraper with Photoshop In this You do not have permission to view the full content of this post. Log in or register now., you learn to work with the transformation of objects and blend modes for them. Composition and construction work on the cloning of elements. Realistic change in space and adding the effect of movement. Throughout the tutorial, you'll learn techniques that You do not have permission to view the full content of this post. Log in or register now. help you create better matte paintings and photo manipulations.

What you’ll be creating
Start creating photo manipulation by adding warships and work on the model. Then begin to create the effects of destruction and adding bullets shattered glass. At the end, add adjustment layers and special effects. You’ll need any version of You do not have permission to view the full content of this post. Log in or register now., inspiration, good mood, turn on your favorite music and take a cup of tea

740x555ximage124.jpg.pagespeed.ic.ujHxpIh9Mz.webp


Tutorial Resources
Step 1
Before you start, download all the material in one place. So it will be easier to work with them. Open Photoshop and start by creating! Open the imageicon1.png of the building. Go to File > New or the short key Cmd/Ctrl+ O and select the image of the building.

369x646ximage21.png.pagespeed.ic.sPyYqAya0b.webp


721x519ximage31.png.pagespeed.ic.thau7GK3kf.webp


Step 2
Add flying warships. To do this, go to File > Place… and select the picture with the ship.

457x664ximage41.png.pagespeed.ic.GuYx5fQQhD.webp


730x527ximage51.png.pagespeed.ic.RJEWf4paFB.webp


Step 3
Duplicate ship 2 times (the short key Cmd/Ctrl+ J) and merge all layers with the ships in one group (the short key Cmd/Ctrl+ G). Time to workicon1.png, we do not interfere with the other ships in the Layers palette, click on the eye icon beside the desired layer. This will make it invisible.

740x472ximage610.jpg.pagespeed.ic.LjwkNm8E0O.webp


Step 4
Reduce the size of the first ship, transformingicon1.png him (the short key Cmd/Ctrl+ T). Reduce it so that it was slightly less than the window. To transform the ship proportional hold Shift and drag the corner. Rotate the image by an angle 13, 55.

700x510ximage710.jpg.pagespeed.ic.XwsigkudCo.webp


Step 5
Now Flip Vertical second ship, the slope and slightly reduce its size. Press Cmd/Ctrl+ T to transform the ship. Then without applying changes, click RMB and from the drop down list, select “Flip Horizontal” or go to Edit > Transform > Flip Horizontally. Rotate the image by an angle – 12, 26. Press Enter to apply the changes.

700x513ximage810.jpg.pagespeed.ic.Cj_sGr8bdO.webp


Step 6
Now take the remaining layer is not changeicon1.png for altars and transfer group. To do this grab the desired layer and drag until as shown in the picture.

426x662ximage91.png.pagespeed.ic.zYw-TnMwOD.webp


Step 7
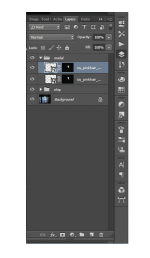
Now duplicate this layer 5 times (the short key Cmd/Ctrl+ J), merge the duplicated layers, and group them already changed ships in one group (the short key Cmd/Ctrl+ G). Call it “ship” Hide interfering layers by clicking on the eye icon in the Layers panel.
720x584ximage1010.jpg.pagespeed.ic.7hXgnBymFv.webp


Step 8
Change the rest of the ships on the same principle as the previous ones (see previous steps). Change in turn tilting, transforming each layer with the ship. Ships can put as shown or come up with your option. Here’s how I did.

740x446ximage1110.jpg.pagespeed.ic.e8BK9DjNtx.webp


Attachments

Step 9
After all the changes, I remove unnecessary parts to ships appeared on the other side of the window. Because we need a realistic
icon_smile.gif.pagespeed.ce.v_1TW3nWi5.gif
In the beginning, I added a mask to the group “Group 2″ and “Ship”.

383x642ximage12.png.pagespeed.ic.JksAPGzNS-.webp


Step 10
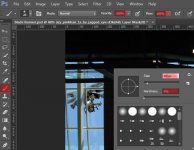
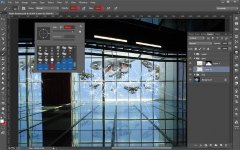
Now select the Brush Tool (B) on the toolbar. Set it to the following settings: Size: 10 – 20 px. Hardness: 0% Opacity: 100% flow: 100%. I used s not much hard brush that there was no sharp transition edges.

740x464ximage133.jpg.pagespeed.ic.aAjJOkaLFv.webp


Step 11
Set the background coloricon1.png to black by pressing D and carefully remove the parts of ships where imposed on the valve box and go beyond it.

740x430ximage143.jpg.pagespeed.ic.-AQa7ttzze.webp


Step 12
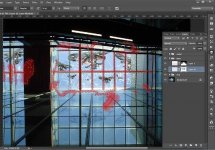
Here’s how I did. I also increased the size of the brush-cleaned stiffness and walked her to the You do not have permission to view the full content of this post. Log in or register now. points between the ship and fittings. Here is the result.

740x439ximage154.jpg.pagespeed.ic.gnNFRDT03F.webp


Step 13
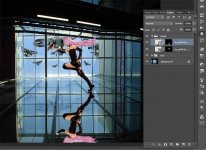
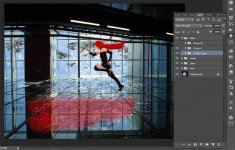
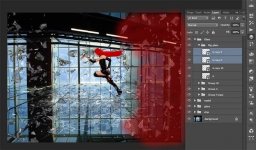
Now let’s add a reflection of ships. Duplicate group “ship” (the short key Cmd/Ctrl+ J). Press Cmd/Ctrl+ T to transform and click RMB and from the drop down list, select “Flip Vertical” or go to Edit > Transform > Flip Vertical. Place the ships as shown in the figure.
740x418ximage161.jpg.pagespeed.ic.Fz_p3ftR0Z.webp


700x532ximage173.jpg.pagespeed.ic.5RB9nQesgk.webp


Step 14
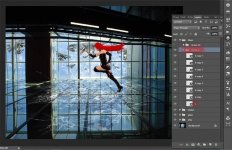
Now I changed the blend mode. Go to the Layers panel, select the list of blending modes to Soft Light, and set opacity group 60%.

700x507ximage181.jpg.pagespeed.ic.BfQbEV35vO.webp


Step 15
Adding the effect of fire! Because the ship combat and hunt for a hero. Create a new layer (the short key Cmd/Ctrl+ Shift + N), click on the icon in the form of a sheet in the Layers panel. It should be mentioned groups with the ships.
Select the Brush Tool (B) on the toolbar. Set it to the following settings: Size: 55px. Hardness: 0% Opacity: 40% flow: 100%.

740x465ximage191.jpg.pagespeed.ic.x0_5GBgzjs.webp


656x452ximage20.png.pagespeed.ic.BoBcx6kneH.webp


Step 16
Choose a color [HASHTAG]#ad2008[/HASHTAG] and just put a few sources of fire on both sides of the ship. Then repeat the same thing, but change the brush size and color on [HASHTAG]#f2c21b[/HASHTAG] and then on [HASHTAG]#f4ed33[/HASHTAG]. Here’s how I did it. You cannot worry about what does not look very realistic. This element has the character of a small detail.

740x408ximage212.jpg.pagespeed.ic.AnI2BecOOY.webp
 

Attachments

Step 17
Now combine the two groups with a layer of fire ships in one group (the short key Cmd/Ctrl+ G) .Here is the result conversion of ships.

740x452ximage221.jpg.pagespeed.ic.3GwbLw8zB2.webp


Step 18
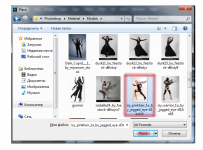
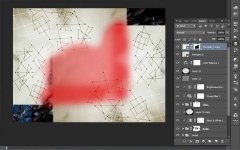
Now it’s time to add the main element – the model in the picture. Go to File> Place and in show window select file with model.

image23.png

Step 19
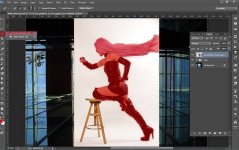
Select Quick Selection Toolicon1.png (W) in toolbar and select model. You can undo part of which allocated by mistake while holding Alt and spending on unnecessary place. Invert selection press the short key Cmd/Ctrl+ Shift + I).

image241.jpg

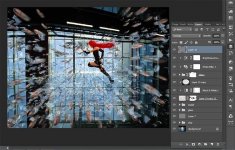
Step 20
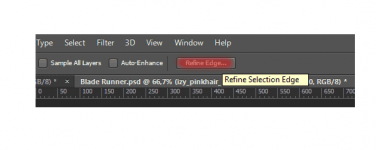
Then go to Refine Edge… in settings panel.

image25.png

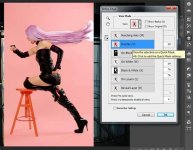
The first thing you need to do is change the display mode selection. To do this, click View, in the list select “Overlay”.

image261.jpg

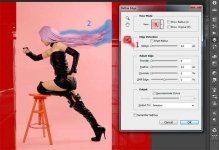
The next step is to remove the white background with hair. To do this, click on the brush icon in this window and spend all the white spots.

image271.jpg

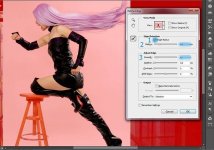
Now we remove possible white glow on model. To do this, put a tick “Smart Radius” and set such settings: Radius: 4,2px, You do not have permission to view the full content of this post. Log in or register now.: 12%. Apply the changes by clicking Ok.

image281.jpg

Step 21
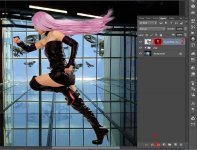
After applying the settings, add a mask by clicking on the mask icon in the Layers panel.

image291.jpg

Step 22
Reduce the model, transform it (the short key Cmd/Ctrl+ T) and place it as shown in Figure.

image361.jpg

Step 23
Now I made ??a reflection model. To make a reflection create a duplicate of the model (the short key Cmd/Ctrl+ J).

image311.png

Step 24
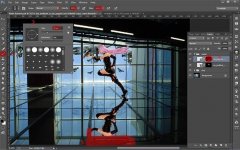
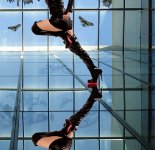
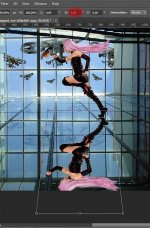
Now flip it vertically. Go to Edit > Transform > Flip Vertical. Move reflected so that it was an accurate reflection of the model. Keep feet reflection model coincided exactly with the model. Do not place too close to the model, make a small margin.

image321.jpg

image331.jpg

Step 25
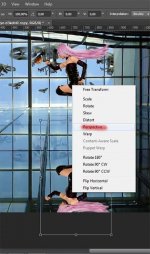
Now we need to transform the reflection according to the slope and the term. Press Cmd/Ctrl+ T to transform the reflection. Then without applying changes, click RMB and from the drop down list, select “Perspective”

image341.jpg

Step 26
Change the reflection as shown in Figure. Set horizontal skew: 6,46.

image351.jpg
 

Attachments

Step 27
Select the Brush Tool (B) on the toolbar. Set it to the following settings: Size: 55px. Hardness: 0% Opacity: 100% flow: 100%. On the layer mask of reflections, remove head, hand and hair model.

image362.jpg

Step 28
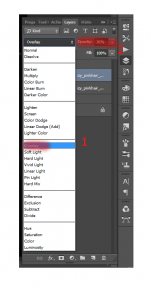
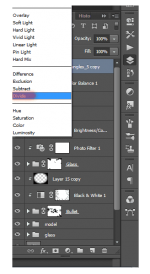
Change the blending mode for the reflection model. Go to the Layers palette and a drop-down list, select Overlay and set opacity 39%.

image37.png

Step 29
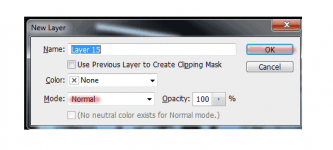
I think pink hair is not very well suited to such a combat fiction. Red hair will look more stylish and it will be a focus in the picture. Proceed to repaint the hair. Create a new layer (the short key Cmd/Ctrl+ Shift+ N or page icon in the Layers panel). Change the blending mode for it to Subtract.

image38.png


Step 30
Select the Brush Tool (B) on the toolbar. Set it to the following settings: Size: 20px. Hardness: 0% Opacity: 100% flow: 100%. Choose a color [HASHTAG]#13e8e0[/HASHTAG].

image401.jpg
Now carefully dyed hair model.

image411.jpg

Step 31
I like the result! Now it is interesting! Will integrate all the layers in the model group and name it “model.” Here is the work at this stage.

image421.jpg

Step 32
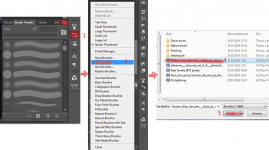
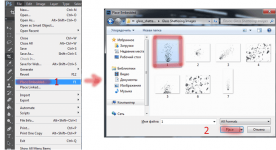
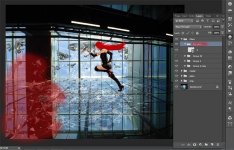
Now let us work the effect of the broken windows and bullet holes. Add the desired brush in Photoshop. If you do not know how to use the search Google J or go to the Brush panel, click on the little button settings top right corner of the window and s drop-down list, select “Load Brushes” and navigate to the brushes.

image43.png

Step 33
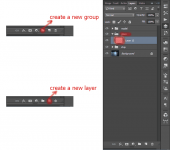
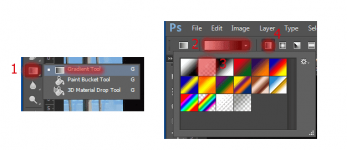
Now create a new group name it “glass”. Place it below the group “model”. Create a new layer. Take the Gradient Tool (G). Set this kind of gradient, as shown in the figure. Set the background color to white.

image44.png

image45.png

Step 34
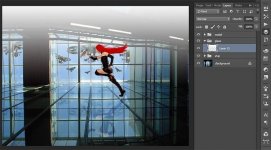
Fill the image as shown in Figure.

image461.jpg

Step 35
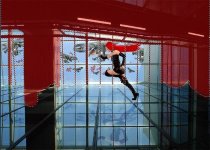
Add a mask to this layer. Use the Brush Tool (B) on the toolbar. Set it to the following settings: Size: 10 – 50px. Hardness: 0% Opacity: 100% flow: 100% and remove the excess with Pictures.

image471.jpg


Step 36
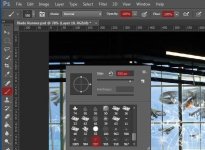
Now create bullet holes in the window. Create a new layer. Select the Brush Tool (B) on the toolbar. Set it to the following settings: Size: 200 – 550px. Hardness: 0% Opacity: 100% flow: 100%

image481.jpg

Step 37
Blue shows what other brushes I used. Put a single click a bullet hole. All other holes put tassels of this collection of brushes on this layer. Change the size and slope of the brush. Fully creative process
icon_smile.gif.pagespeed.ce.v_1TW3nWi5.gif


image491.jpg
 

Attachments

Step 38
Add a mask to this layer. Use the Brush Tool (B) on the toolbar. Set it to the following settings: Size: 10 – 50px. Hardness: 0% Opacity: 100% flow: 100% and remove the excess with Pictures.

image50.jpg

Step 39
All I have done the same thing with the other bullet holes. That those holes on the floor of the room painted using a changes brush prospects. , I added a mask to the layers and cleaned with extra fittings, floors and windows.

image511.jpg

Step 40
It’s completely creative process and everyone can do as he likes. I did like this. In the process. In order not to interfere with the model, I hid it.

image521.jpg


Step 41
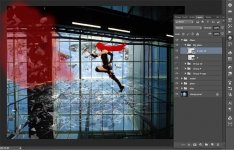
Now get to work on the glass fragments. Go to File > Place… and select file with glass fragments ? 1.

image53.png

Step 42
Reduce the size of the glass fragments, transforming them (the short key Cmd/Ctrl+ T).

image542.jpg

Step 43
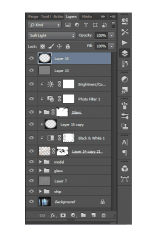
Duplicate glass fragments 2 times (the short key Cmd/Ctrl+ J) and merge all layers with the ships in one group (the short key Cmd/Ctrl+ G). Create another group name it “Glass” group and place the group with fragments there. This is a major group will be all the fragments. Then we apply it to the adjustment layers.

image551.jpg

Step 44
By the same principle (see previous steps), I put the other variants of fragments. In this step, I used glass fragments ? 1, 2, 5, 7. The pictures show what layers arranged as their location in the group (sequence).
Glass fragments ? 1 (Duplicate 2 times).

image561.jpg

Glass fragments ? 2 (Duplicate 1 times).

image571.jpg

Glass fragments ? 5

image58.jpg

Glass fragments ? 7 (Duplicate 3 times).

image592.jpg

Glass fragments ? 5 (Duplicate 2 times).

image601.jpg

Step 45
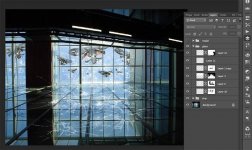
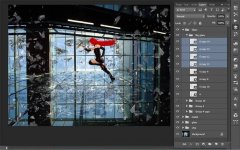
Here is a picture with all layers.

image611.jpg

Step 46
Create another group (the short key Cmd/Ctrl+ G). Place the glass fragments ? 6 on floor there. Duplicate glass fragments 7 times (the short key Cmd/Ctrl+ J). Place them throughout the site with bullet holes. Change the size of some of the fragments, making them a bit more.

image621.jpg

Step 47
Duplicate group (the short key Cmd/Ctrl+ J) with glass fragments ? 6. Moreover, use Move Tool (V) to move it forward a bit closer to the darkest part. Look as shown in the figure.

image631.jpg
 

Attachments

Step 48
Now add a large flying glass fragments. Go to File > Place… and select file with glass fragments ? 6. Create another group (the short key Cmd/Ctrl+ G) name it “Big glass”. Place the file there. Make them big, transforming them (the short key Cmd/Ctrl+ T).

image641.jpg

Step 49
Duplicate glass fragments (the short key Cmd/Ctrl+ J) and locate duplicate in the upper left corner.

image651.jpg

Step 51
Now select these two layers and duplicate them. Flip Horizontal duplication layers, go to Edit > Transform > Flip Horizontal. Place them in the right part of the picture.

image661.jpg

Step 52
Select all 4 layers (hold Shift) and duplicate them (the short key Cmd/Ctrl+ J).

image671.jpg

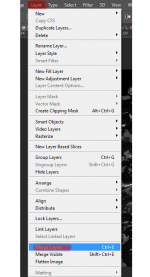
Then combine duplicate 4 layers one layer. To do this go to Layer > Merge layers or the short key Cmd/Ctrl+ E.

image68.png

Step 53
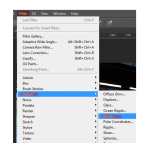
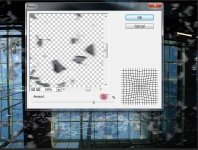
Now, create the effect of flying glass. To do this, applicable the effect “Pinch”. Go to Filter > Distort > Pinch… and apply Amount: 50%. Click Ok.

image69.png

image701.jpg

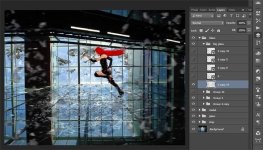
Here’s how it looks. Blurred layer must be below all the other layers with big glass.

image711.jpg


Step 54
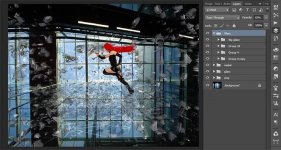
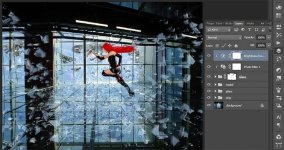
Here is the whole picture at this stage.

image721.jpg

Step 55
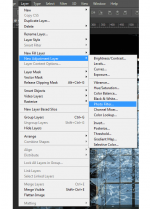
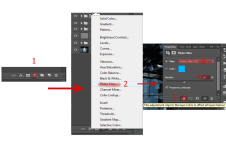
Now add two adjustment layers to a group with glass fragments. The first layer is a photo filter. Go to Layer > New Adjustment Layer > Photo Filter… or click on the adjustment layer icon in the Layers.

image73.png

Set the settings: Filter: Cooling Filter (82). Density: 39.

image74.png

Step 56
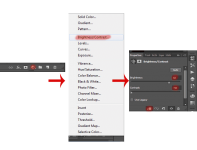
Next adjustment layers is Brightness/Contrast… Set the settings: Brightness: 82. Contrast: -50.

image75.png

Step 57
How to combat fiction without weapons element? I thought that the bullets would be a good addition to the picture. I will not describe as I did one of the bullets, what you’ve downloadedJ, because it is very tedious and time consuming. Take advantage of my works, if you want
icon_smile.gif.pagespeed.ce.v_1TW3nWi5.gif
Now get to work! Go to File > Place… and select file with bullets.

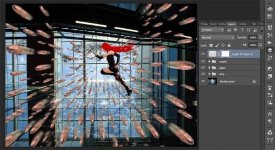
image761.jpg

Step 58
Transform the bullet so that the big bullet half went beyond picture and add a mask to this layer.

image771.jpg
 

Attachments

Step 59
Use the Brush Tool (B) on the toolbar. Set it to the following settings: Size: 100px. Hardness: 0% Opacity: 100% flow: 100% and remove the excess Bullet unnecessary. Especially pay attention to the model. It should be bullets.

image781.jpg

Step 60
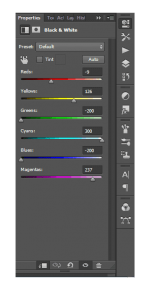
Add to layer with bullets adjustment layer Black & White… with settings as shown in Figure.

image79.png

Step 61
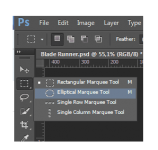
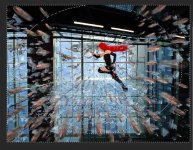
Now add to this layer black vignette. Take Elliptical Marquee Tool (M) on the toolbar and draw a large ellipse. Invert the selection (the short key Cmd/Ctrl+ Shift +I) to what you see in Figure.

image80.png

image811.jpg

Step 62
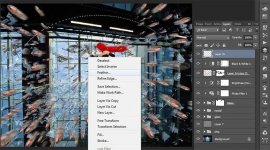
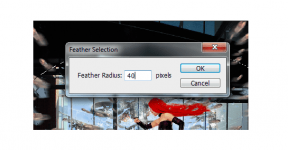
To blur the edges, click RMB on the elliptic and select from the list “Feather”. Set feather Radius: 40%.

image821.jpg

image83.png

Step 63
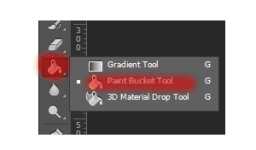
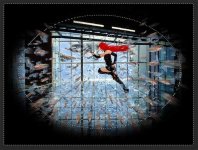
Now select the Paint Bucket Tool (G) on the toolbar and fill the selection black color.

image84.png

image851.jpg

Step 64
Now change the opacity to 33% of this layer. Hold down Alt and click on previous layer to get as shown in Figure.

image86.png

Step 65
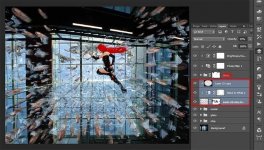
Select (hold Shift) and move the layer with bullets and adjustment layers subgroup with glass fragments.

image871.jpg

Step 66
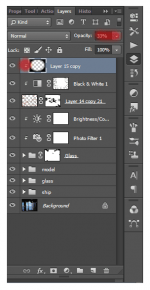
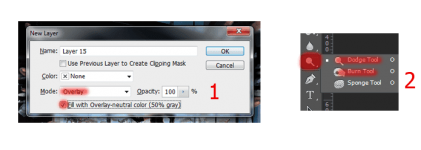
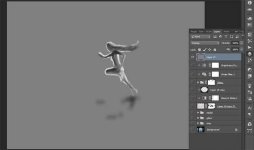
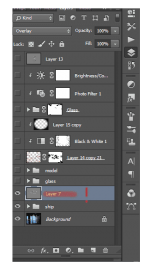
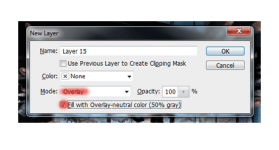
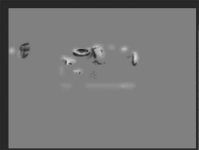
Now you need apply to correctly the shadows. To do this, create a new layer (Cmd/Ctrl+ Shift +N) the menu that appears, set the settings as shown in the figure. Use Dodge Tool (O) to draw bright light parts and use Burn Tool (O) to draw the dark areas and shadows.

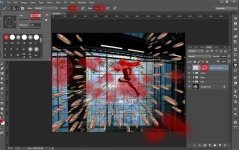
image88.png

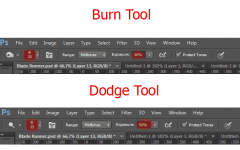
Step 67
Try to maximize image contrast is achieved. Set the settings for both instruments such. Was the main model, because the atmosphere is ready.

image89.png

Step 68
Here’s how I dealt light and shadow.

image901.jpg
 

Attachments

Step 69
Now route the light and shade for ships. Be sure to create a new layer position it as shown in the figure. To make it easier to work, hide all the layers by clicking on the competition in the eyes of the Layers panel, except for the group with the ships and facilities.

image911.png

image92.png

Step 70
Try to maximize image contrast is achieved. The Dodge Tool (O) and Burn Tool (O) settings remain the same. Here’s how I dealt light and shadow.

image931.jpg

Step 71
Here is the work at this stage with all open layers.

image941.jpg

Step 72
Now duplicate the vignettes that make for a bullet and move the very first, as shown in Figure.

image95.png

Step 73
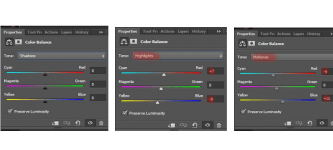
Need to create a contrast image. So, create Color Balance adjustment layer. Set settings how show on Figure.

image96.png

Step 74
Note that this adjustment layer as a vignette effect on the whole picture! Here is the result after adding the adjustment layer.

image971.jpg


Step 75
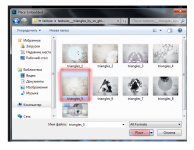
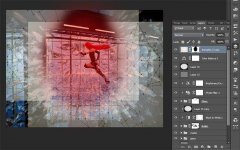
It seems to me that the work is missing something – something resembling the nanostructure :). So I decided to add a whimsical and fantastic texture. Let’s get started! Go to File > Place… and select file with texture crystal lattice.

image98.png

Step 76
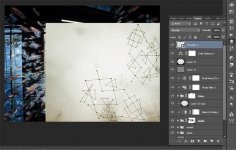
Now pull them almost the entire area of the picture. Move it slightly to the right.

image991.jpg

Step 77
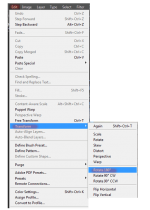
Duplicate the texture layer (the short key Cmd/Ctrl+ J). Now you need to rotate it on an angle 180. Go to Edit > Transform > Rotate 180.

image100.png

Step 78
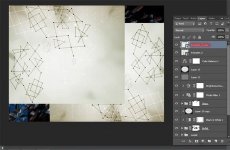
Move this layer to upper left corner as shown in Figure.

image1011.jpg

Step 79
Add to top layer with texture layer mask and remove the middle. Change the opacity to 50% of each layer.

image1021.jpg

Step 80
Now combine these two layers (the short key Cmd/Ctrl+ E), and add layer mask to this layer. Set Brush Tool (B) with settings: Size: 100px. Hardness: 0% Opacity: 100% flow: 100% and remove center.image1031.jpg

Step 81
Now change the blending mode for this layer to “Divide” on Layer panel.

image104.png

Step 82
Here’s how the work began to look after the addition of texture.

image1051.jpg
 

Attachments

Step 83
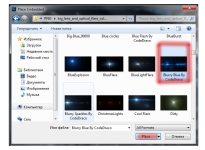
It remains to add a small, but very important and beautiful detail – optical flare. Go to File > Place… and select file with optical flare (Blurry Blue By CodeDraco).

image106.png

Step 84
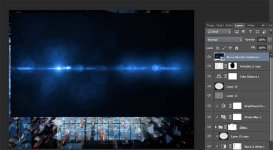
Place it as shown in the figure. It should be approximately at the level of the hole in the window.

image1071.jpg

Step 85
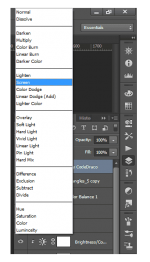
Now change the blending mode for this layer to “Screen” on Layer panel.

image108.png

Step 86
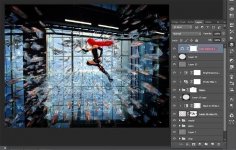
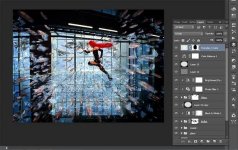
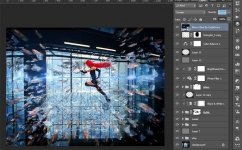
Here is the final result with all layers. I hope you enjoyed it!

image1091.jpg

Final Results
image134.jpg

You do not have permission to view the full content of this post. Log in or register now.
 

Attachments

mapapa wow ka tlaga basta si sir chip..
_nice...
salamat sa share..(y)
 
Dear Master Chief,

Since 2 years have passed since the last reply in this thread, I am locking it to prevent necroposting. Feel free to start a new thread or contact any forum staff if you want this to be reopened.

Thread closed.
 
Status
Not open for further replies.
Back
Top